Imaging with CGE1400
CGE1400 is an incredibly versatile imaging setup! It can be used for high magnification deep sky imaging at f11, medium scale deep sky imaging with reducers usually at f7 or f8 and wide field astrophotography at f2 with Hyperstar. Very few other scopes can achieve that! Actually I am not aware of any other except C14's smaller brethren C11 and C8 (and now also their EdgeHD versions including EdgeHD 9.25). This page is dedicated to various aspects of imaging with C14 - for more information about useful accessories (imaging and otherwise) please check "accessories" submenu.
The cameras I used with my C14 all have sensors similar in size to APS-C standard, i.e. 25.1x16.7mm. I used them at f11 (native) focal ration, at f7 with Celestron f6.3 reducer, at f5 with Lumicon Giant Easy Guider reducer, f8.8 with Teleskop Service 0.8x reducer/flattener and f2 with Starizona Hyperstar 3. In all cases there is always some vignetting present, but in all cases it can be easily cured with flat field frame. I have built a custom light box to produce flats easily. The extent of vignetting varies, as demonstrated below on the flats taken with Canon XTi and Canon 40D. The graphical comparison across the diagonal of the flats shows that use of flats is highly recommended in all cases. The best is of course native focal ratio f11, where illumination goes down only to 85% in the corners, with f7 being the worst (35%). However as bad as it looks number-wise, 35% is not bad at all, we are talking corners here! Illumination across 2/3 of the field is above 80% in all cases, so the corners can be either cropped, or fixed with flats at a cost of higher noise (S/N will be 1.7 times lower at the very edge of a corner). Hyperstar flat is the only one somehow asymmetrical, bottom part is dimmer than the top one, most likely due to an obstacle (mirror?) interaction with a very fast converging f2 light cone.
|
|
|
|
) |
) |
|
C14 flat frame at f11 |
C14 flat frame at f7 |
C14 flat frame at f5 |
C14 flat frame at f2 |
Vignetting profiles |
)
)
)
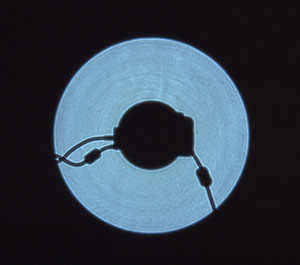
As for the image quality Hyperstar comes probably first with its well corrected flat field together with Teleskop Service 0.8x reducer/flattener which seems to be really good as well. Hypewrstar is a set of lens that mounts in the place in the secondary mirror, I got it in September 2007. It converts Schmidt-Cassegrain telescope into a flat field corrected Schmidt camera with focal ratio f1.9. F1.9 allows for shorter exposures where previously very long ones were needed: 1 minute exposure at f1.9 is equivalent to around 12 minutes at f6.3! It is possible because the light becomes concentrated on much smaller area - so each pixel gets more light but covers also much larger area of the sky - about 1.8 arc sec / pixel for Canon 40D (1.6 for ST-8300M and 2.4 for QHY8). The field of view is around 113'x75' for C14 Hyperstar. It is very easy to set up, after one overcomes the fear of removing secondary mirror and attaching something big and heavy to the corrector plate. BTW, the collimation of the secondary mirror is well preserved, and there is usually no need to re-collimate after Hyperstar. The additional obstruction from Canon Digital Rebel XTi or 40D is quite small, below there is an image with defocused star showing the shadow of secondary mirror mount (Hyperstar is of course smaller than that, so it doesn't show) with some parts of Canon protruding on the left and right with cables. The cables will create diffraction spikes.
The pictures below show assembled CGE1400 Hyperstar system almost ready to go (dew shield is missing). A very important thing to remember when setting up a Hyperstar is to run the cables from the camera along the scope's OTA and tie them to the back: there should be no stress on the corrector plate coming from cables. I tie them to the handle on the back of C14, leaving the cables just loose enough between the handle and the camera to allow camera rotation if needed. Since then I acquired many images with Hyperstar, some examples are Pleiades (no reflections!), Cone Nebula, Pelican Nebula (narrowband) or NGC6992.
)
)
)
|
)
)
)
)
)
|
It is important to have Hyperstar unit well collimated - and check it before each imaging session. I focus first (usually with my Bahtinov mask) and then I do a trial long exposure. Then I stretch the image a lot, such that the faint details show up (and bright ones might be burned out). If the stars at on the edges and in the corners do not show any evidence of elongation or coma, all is fine. Elongation generated by wrong collimation changes direction and magnitude (usually nothing in the center) throughout the image, while the one caused by guiding error is the same everywhere. It is easy to collimate Hyperstar using the collimation knobs - but one should make only small adjustments, and tighten the locking screws to prevent rotation.
Imaging at the native focal ratio f11 is difficult for deep sky, and with my sensors results in big oversampling, an example is Owl Nebula. It may still be useful for small objects, but the images show field curvature in the edges. Much better choice is to use a reasonable focal reducer. The largest is Lumicon Giant Easy Guider reducer, 80mm diameter results in low vignetting, but unfortunately it is a simple optical design and it does not provide significant corrections, even worse it does introduce some chromatic aberration visible on the brightest stars. Example of an image with GEG is NGC4565. Celestron f6.3 reducer works very well, it eliminates curvature, but not coma, and it does introduce vignetting, its field of view with Canon 40D is around 30'x20'. Image example is M27. I am now using TS 0.8x reducer/corrector for SCT from a German company Teleskop Service. It is advertised to correct all important aberrations (coma included) and it essentially produces an equivalent of an EdgeHD C14 OTA upgrade. Its field of view is around 24'x16' with and APS-C sensor. Most of my recent images with C14 are done either with Hyperstar or TS 0.8x reducer/corrector.
|
|
|
|
|
|
Imaging setup with f6.3 focal reducer | |||
)
)
)
)
CGE is a very good mount, with a reasonable periodic error (and a periodic error correction, but I am not using this feature), but it does require autoguiding for longer exposures. Even with Hyperstar I find guided exposures to be better. I started autoguiding using piggybacked C80ED refractor and my old Meade DSI color camera. The problem with guiding through a piggybacked refractor is flexure. Doesn't matter how rigid the system is - and certainly Ken Millburn rings and dovetail are rigid, there is always a flexure somewhere: focusers, sagging long extensions or finally a dreaded mirror flop. My C14 was never bad regarding the mirror flop, but I have installed mirror flop stoppers from Ironwood Observatory when I tried to extend subexposure time as much as possible. It helped some, but unfortunately there are other sources of flexure. Nevertheless, I was able to keep the flexure under control, so 5-6 minutes exposures are not a problem. However, sometimes one needs longer exposures (e.g. for narrowband imaging), and then it is time to consider an off-axis guider.
The easiest way to recognize a flexure problem is to evaluate a long series of exposures - if the image is shifting gradually in approximately the same direction direction all the time there is a differential flexure problem. If the degree of flexure shift is small enough not to show as a star elongation on the sub exposures it is OK, but above certain exposure length it will show ... It is actually a good idea to find out what is the longest exposure possible without flexure problem - many people spent lots of time trying to eliminate star elongation by improving guiding while they should have worked on flexure - or accept the maximum exposure time achievable with piggybacked guiding. It also helps to have a sensitive low noise guiding camera - especially to dampen vibrations caused by moderate wind - that is why I use StarlightXpress Lodestar guider. In any case CGE1400 is sensitive to wind, and I found that imaging doesn't make sense anymore with sustained wind above 5-7 mph. Dropping dew shield helps some (dew is not a problem in windy conditions).
My current setup for C14 imaging at high focal ratio (f8.8) consists of SBIG ST-8300M camera, Astronomik filter drawer, Orion SteadyStar Adaptive Optics Guider with StarlightXpress Lodestar as a guiding camera and Teleskop Service SCT 0.8 reducer/corrector. Here are examples of the images produced: the first were NGC5005 luminance and NGC5005 LRGB, more recent are M1, NGC2392, M27 and M51. Below are the pictures of the imaging setup itself, for more about Orion SteadyStar please check "Adaptive Optics" page.
|
|
|
|
|
|
Imaging setup for f8.8 with Orion AO, StarlightXpress Lodestar, Astronomik filter drawer and SBIG ST-8300M | |||
)
)
)
)
)
The white circle on the back of C14 is made of foam core poster board and has angle marks every 10º - it helps very much with the off-axis guider orientation. I always look for the best guide star when preparing for imaging session with with TheSkyX.
I took some test images of M67 to assess how the guiding and TS 0.8x reducer/corrector work. Below is my first set of 1 minute exposures of M67 core. They show that the TS 0.8x reducer/corrector is indeed very good, field appears to be flat and no coma can be found anywhere. The image below on the left shows a singe uncorrected 1 minute exposure stretched in Photoshop, the right one is a combination of six bias and dark corrected frames.
)
)
Recently I discovered some problems with focus in an observing session with an extreme temperature change, which prompted me to buy Optec temperature compensating focuser. More info is here. The other improvement was an addition of Orion USB Nautilus Filter Wheel (sadly now discontinued).
)
)
)
)
)
)